AIX-LINUX Blog
Friday, October 13, 2023
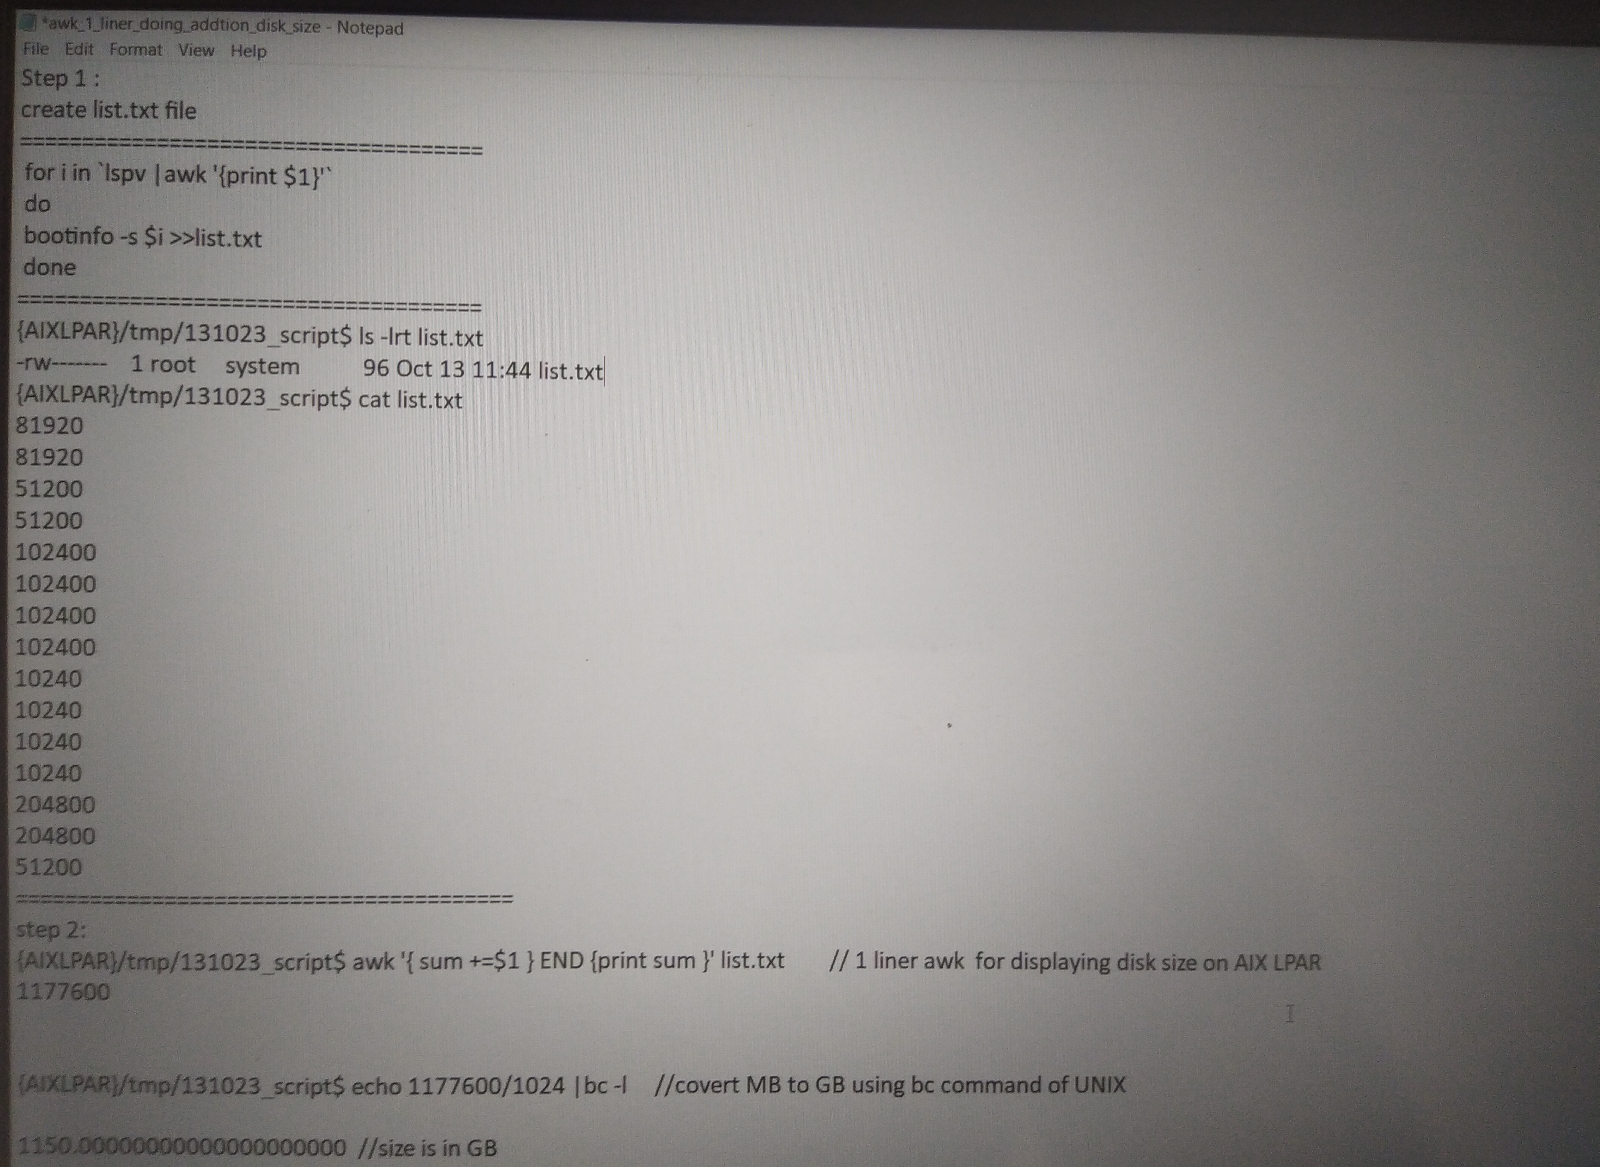
awk one line command for displaying total storage assigned on AIX LPAR
Friday, September 29, 2023
SAN disk path health check script using diff command UNIX
Here following script will be helpful during SAN switch activity, where AIX admin involved for health check of disk before and after activity.
=============================================
step 1: create directory in /tmp "health_check_disk"
#cd /tmp
#mkdir health_check_disk
Step 2:
create 2 file with following name
#cd /tmp/health_check_disk
#touch s1 s2
s1===>contain path information for all physical volume on AIX server
s2===>will contain path information for all physical volume on AIX LPAR.
step 3:
check content of s1 file
#cat s1
Enabled hdisk0 fscsi0
Enabled hdisk0 fscsi1
Enabled hdisk1 fscsi0
Enabled hdisk1 fscsi1
Enabled hdisk2 fscsi0
Enabled hdisk2 fscsi1
Enabled hdisk3 fscsi0
Enabled hdisk3 fscsi1
now we will see actual script how it create lspath data before SAN activity.
------------------------------------
for i in `lspv |awk '{print $1}'`
do
lspath -l $i >> s1 //Create s1 file with pv path information
done
----------------------------------
==========================
lspath data after SAN activity
----------------------------------
for i in `lspv |awk '{print $1}'`
do
lspath -l $i >> s2 Create s2 file with pv path information
done
----------------------------------
Now AIX admin need to perform "diff" command execution on both file
#diff s1 s2 // If this command return nothing then no paths is failed ,missing or defined state
#echo $? //return 0 then no paths change happened both s1 and s2 file same
if above command return disk output with name path information then path is changed after AN activity so AIX admin need to correct those path using "chpath".
for example if after SAN team san switch migration some path got faulty then s2 file will contain following failed path
#cat s2
Enabled hdisk0 fscsi0
failed hdisk0 fscsi1
Enabled hdisk1 fscsi0
failed hdisk1 fscsi1
Enabled hdisk2 fscsi0
failed hdisk2 fscsi1
Enabled hdisk3 fscsi0
failed hdisk3 fscsi1
When AIX admin run "diff" command on both file it will throw output with line number and file content. it also display what was content of s1 file and what difference now it having. so AIX admin easily identify those hdisk and correct their path
#diff s1 s2
Output:
It will show that s1 and s2 file has diffrence and show what was that diffrence
like hdisk0 fscsi1 path got failed and that was in enabled state before SAN team activity.
Thanks !!
Script to find stale physical partition on AIX LPAR
Wednesday, September 27, 2023
/bin/rm: argument list too long
what is the solution to this error on UNIX or Linux???
solution:
When UNIX admin tries to delete too many files using rm command then he came across this error to address this error he can follow below solution
1.
find /tmp/logs -mtime +90 -exec -rm -f {} \;
above command will pass list of files older than 90 days to rm and it will remove those files
2.
find /tmp/logs -mtime +90 -print |xargs rm -f
it will also remove files older than 90 days
How to pass argumnet to xargs using n option to make sure it will delete n number of file
find /tmp/logs -mtime +90 -print |xargs -n 20 rm -f
it will delete/remove file in set of 20 .
Thanks
Dump device too small to store system dump ,warning message is AIX errpt
Hello everyone, today i am writing about following error in AIX errpt
Dump device too small to store system dump, warning message ?????
How AIX admin resolve this error and why its important to address this error.
dump device used to store memory image or it captures memory snap when AIX system crash, so that image is very much useful during analysis by Expert or finding main cause of the system crash.
Useful command on AIX system to get information about system dump device are following:
know the potential size of the dump AIX would generate:
#sysdumpdev -e
To change the primary dump device as sysdumpnull:
#sysdumpdev -p /dev/sysdumpnull
To change the secondary dump device as sysdumpnull:
#sysdumpdev -s /dev/sysdumpnull
To change the primary device permanently:
#sysdumpdev -P -p <device_name>
To change the secondary device permanently:
#sysdumpdev -P -s <device_name>
To create the secondary dump device:
Command to create dump device in AIX using mklv command, make sure that volume group have sufficient space.
#mklv -t sysdump -y <dumplv_name> <vg_name> <no of PPs>
#mklv -t sysdump -y lg_dumplv rootvg 6 hdisk0
Also AIX admin can create dump device using
smitty mklv command=>create LV=>mention LV name,type as dump and number of pps
How to calculate AIX dump device size and create required size dump device??
check following image snap ,it having details
Once aix Admin confirmed size he can create dump lv and make it primary using above command
Thanks !!!